We wanted to turn our starter home into our dream home.
Here’s our story. We met December of 1995, after months of my sister trying to “set” us up. Once we did meet it was like magic! We then dated for 1 year and 8 months, until we finally got married in August of 1997. It took a bit of convincing on my part. Heber was stressed about the financial part, and taking care of a new wife. Ha! Little did he know that was the least of his worries. Finances are my thing, but I didn’t know that yet and neither did he.
About 6 months after we were married, Heber hired on with the Fire Department in Salt Lake. At that point I convinced Heber we could live off his income and we’d save all of mine for a down payment for a house. I started saving all my tips from waiting tables, and working retail at Eddie Bauer. At this point I had graduated from BYU with a degree in business management, but I still hadn’t landed a “real job” yet.
1 year after we were married we signed papers to build a house in the middle of nowhere! Eagle Mountain had great prices on starter homes, and it was a new community. I didn’t really care that it was in the middle of nowhere, I just wanted a house.
 This was the most exciting day of the whole build–seeing the foundation poured.
Heber convinced me that we should spend a little more to make sure we had room to grow into the house. You know…”if we want 4 kids we need at least 5 bedrooms”. So we spent $135,000 instead of $100,000.
Anyhow we’ve committed to staying here as our “forever” house, so we’ve had to remodel a bit along the way to accommodate our family. We now have 3 boys 15,13,and 11 years old. Our house has had to change with us. We finished the bonus room, we finished the basement, and we converted the garage to my work studio. We also started taking out some walls to make a dining room.
 BEFORE–wall behind the front door (guest bedroom was on the other side).
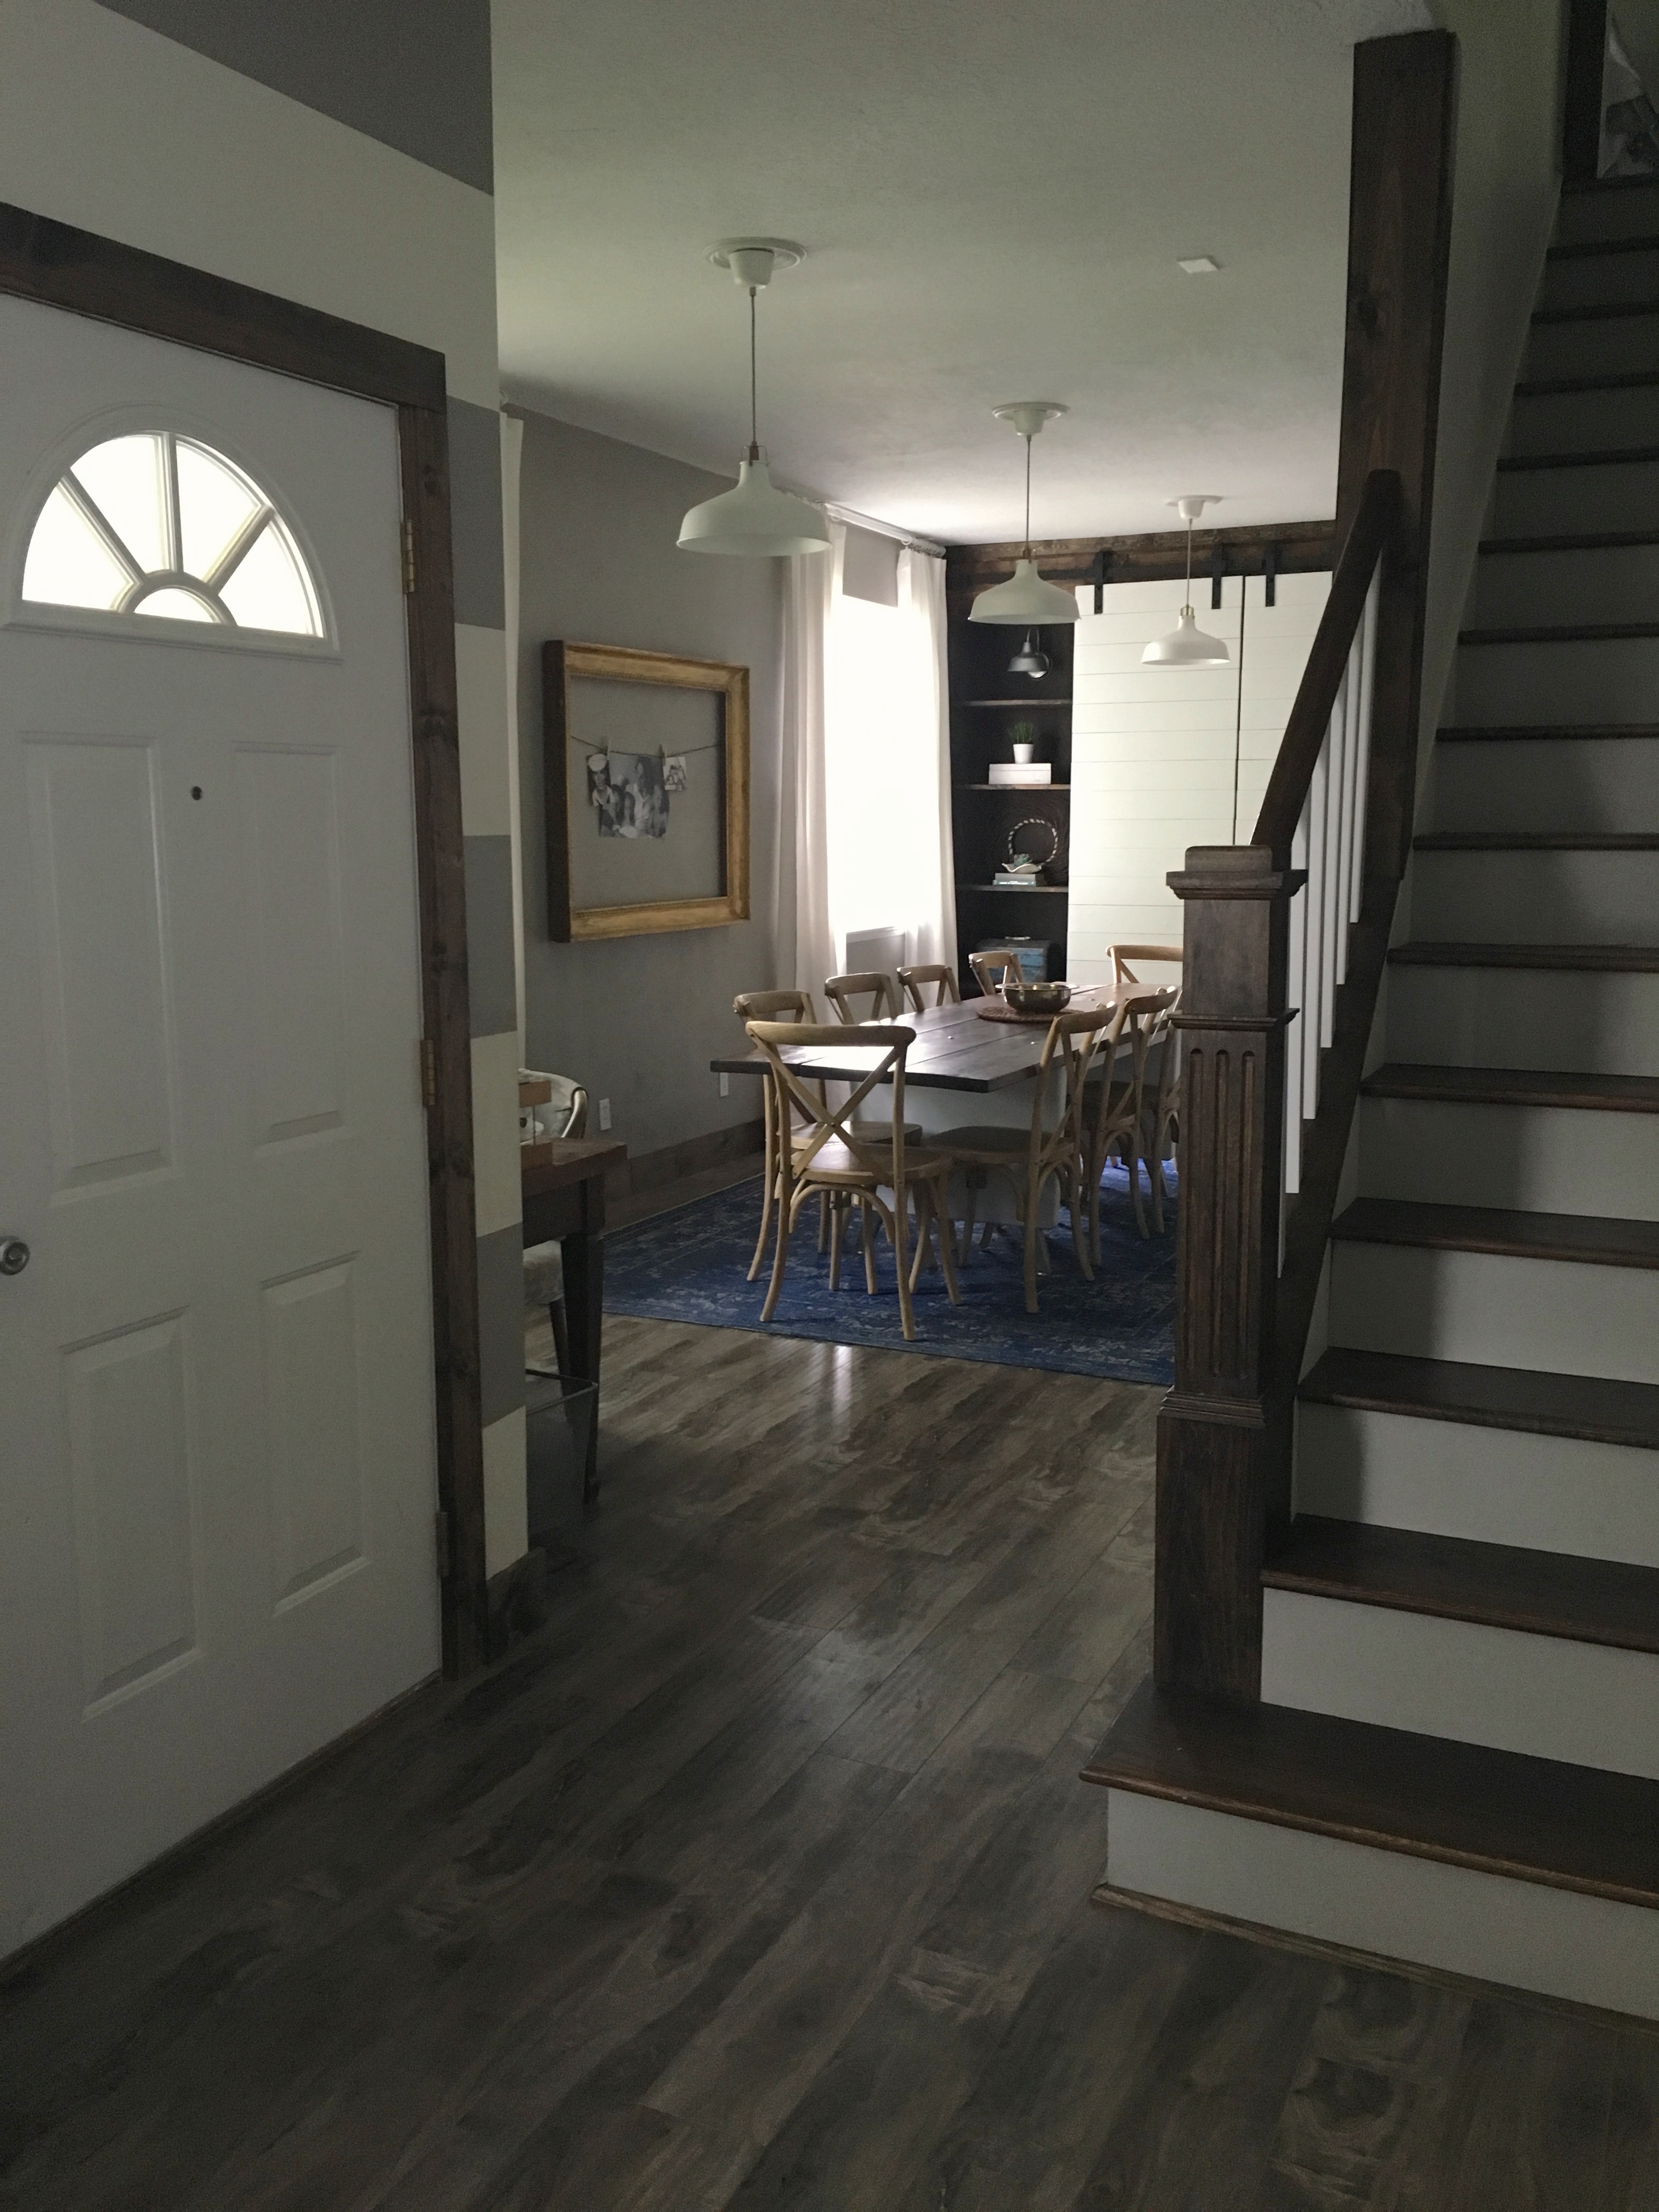
 AFTER#1–We opened it up and turned it into an office about 2years ago.
 AFTER#2 ! We took out the next wall and eliminated the guest bedroom again, and turned this space into a dining room with a 10′ table. Our master bedroom is the only bedroom left on the main level. All the boys still have their own bedrooms in the basement.
Heber was a little leary about this idea, because we were eliminating some closets, I told him I’d figure it out. We moved the guest bed up to the bonus room where we were storing a treadmill we never used and some other crap. Then we framed in the closet down at the end of the dining room with built in shelves. It’s perfect, we still have a guest room and a closet.
I know this may change our home value, because we’ve eliminated 2 bedrooms, but it works better for our family. Plus, we really are staying forever, so it doesn’t really matter. I want the space to have other families over for dinner, and I want the boys to come back home for Sunday dinners after they get married and leave.
I threw out my idea to Heber, and after 3 or 4 days he agreed. So we planned on starting the demo as soon as he got off his next shift (Thursday morning).
 Wednesday night, the boys were chomping at the bit! I let them have at it. I let them shoot arrows at the walls and kick through them, and cut them up with the hack saw. It was a PARTY!
 DEMO-
DEMO-
 It was so exciting to see the walls out! The space was HUGE!

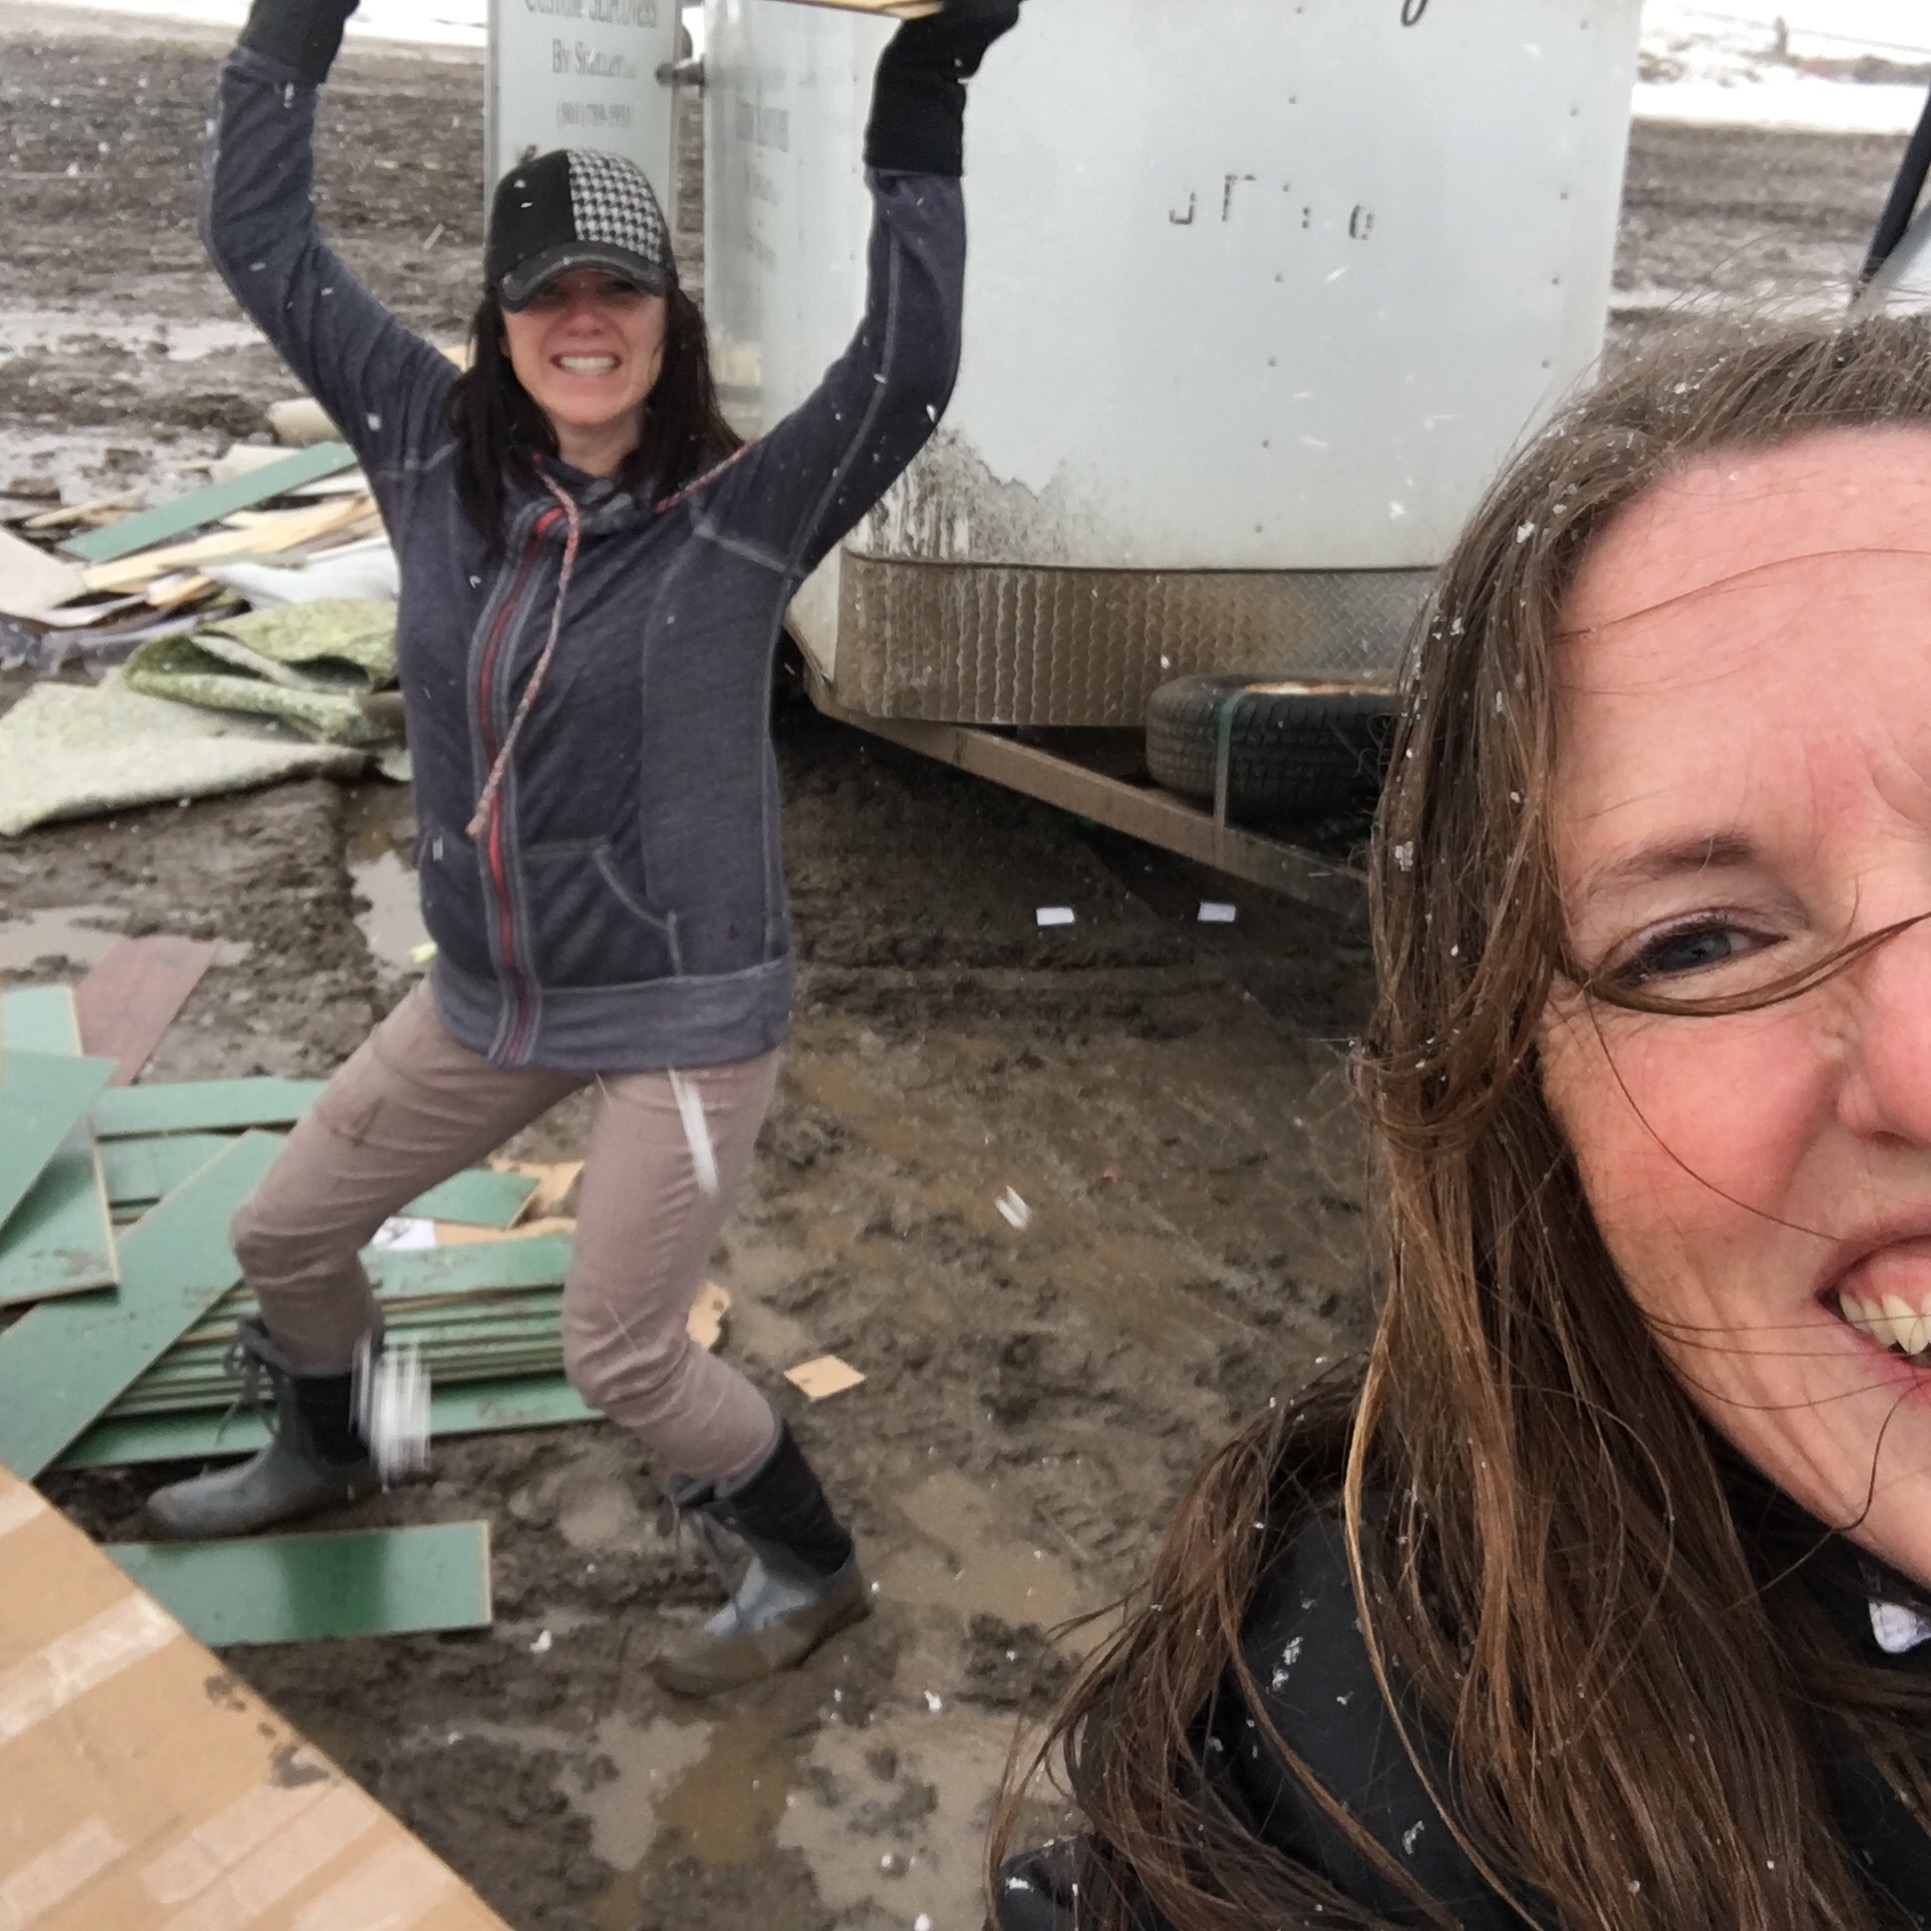
We decided while we were at it, we’d redo all the flooring on the main level. The carpet was 17 years old, and the dark walnut laminate was 10 years old. Got it all loaded in the trailer, and Heber needed me to take it to the dump while he finished laying the floors with his dad and brother. So I called up my bestie and told her to wear her rain boots. It was crazy wind, snow, and mud!
 I am in love with the floors. They are Kingmen Alpine Grey 12mm handscraped laminate flooring.
 I was even more excited to have the floors continue into our master bedroom! It feels much more fancy now.
 I needed a 10′ dining table. I had this old desk a neighbor gave me for free that came out of BYU back in the day. I started looking at it and realized I could unscrew the top, which would make it the perfect base. I love industrial metal stuff and rustic wood. I decided to spray paint the base white, but leave the silver feet and then plank the top with 2×10’s.
 Camille is a WAY better spray painter than me…so I had her do the honors.
 I got my rug off Target.com it’s basically like a flat weave, but doesn’t roll up or shift on the corners and has bits of soft chenille strands woven through it for texture. I was nervous about it, but it came and it was everything I’d hoped for.
 I obsessed over chairs forever! I Finally committed and ordered these from a random event furniture site. I need to get some more photos on the wire in the frame…but for now it’s fine.


 We made the barn sliding doors to hide the closet. Rough and rustic. They aren’t perfect, but I love rustic stuff. Imperfectly, perfect is what I always say. I had someone custom build the two 8′ tall book shelves to flank both sides to hold up the header above for the barn door hardware.
 I added some old stuff to the shelves. I LOVE old stuff! This whole vignette was $5 from the thrift store.
 I also love old metal boxes. My mom gave me a few from Grandpa Keiths stuff. The colors were perfect, and I love that they have sentimental value.
To sum it up…BEFORE
AFTER! All in all, it cost about $6,000 to remove wall, replace drywall, paint, install new floors on whole main level, replace all trim, new rug, table, chairs, and new light fixtures.
Some may argue, it’d be cheaper to sell and move. $6,000 wouldn’t even cover the realtor fee is my reply. We love our house, and that it has changed with our family and our needs. It’s our first home and our last home.


